5th Grade Turtle Art
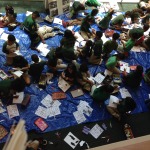
“What happens when you click ‘forward?'” we asked, referring to an icon on the students’ computer screens. Several kids—mostly those who had seen “Turtle Art” before—raised their hands and said it “makes the turtle go up.”
This was the introduction to a programming unit our 5th graders will be working on for several weeks. In “Turtle Art,” students enter basic commands (such as “forward,” and “left”) to move a turtle around a screen. The turtle has ink on her tail, and wherever she moves, she draws a line.
“So,” we asked, “what happens if you click ‘right?'” and the kids said it makes the turtle go right. (Actually it makes the turtle turn right, in place—but we didn’t tell them that.) Then, in teams of two, we let them experiment with the different commands by themselves. Their goal for the day was to draw a square—any old square—using just three commands: “forward,” “right,” and “clear.” (So, this could look like “forward 100,” “right 90,” repeated, to make the turtle move 100 spaces forward, then turn right 90 degrees, and so on.) When students got stuck, we had them physically walk out their commands around the classroom, to get a sense of what the turtle might do.
As the unit goes on, students will have to work together to draw circles, houses, and their initials. It’s an exercise in critical thinking, and collaboration. We’re excited to see what everyone comes up with!
![]()
Making at a Glance: Sock Puppets
Our kindergarteners made some awesome sock puppets last week. They measured and cut their own materials, and safely handled hot glue guns by themselves. What do you think of the “Creepy Carrot” puppet? We love it!
Inside the Project: Paper Mache (Part 1)
Part of joining the Creativity Lab team meant making a project of my own. Can’t teach making or talk making unless you’ve got some experience making—right? So, I brainstormed what I might like to do, and why it might make a good project. I wanted to incorporate some circuitry, as it’s a big part of our students’ making here at Lighthouse, but I’ve got more of a passion for traditional arts and crafts than computers, so I wanted a project that really embodied that spirit. I thought back on different crafts I’ve done over the years—woodworking, painting, origami, beadwork—and settled on good ole paper mache.
When I was about seven or eight, my mother bought me “The Simple Screamer: A Guide to the Art of Papier and Cloth Mache,” by Dan Reeder. It’s hard to find these days (I still have my copy!), but lucky for all of us, Dan’s gone digital, and his website is full of time-lapse and instructional videos, showcasing his amazing work. I didn’t refer to any of them for this project.
As a kid, I always wanted my projects to look exactly like the one’s in Dan’s book. It had to have the same face, and the same paint job, and any deviation was “wrong.” That’s definitely not the maker mindset, and I’m glad to be over it. For this project, I wanted to explore paper mache without seeing how Dan “The Monster Man” does it. My goal here was to tinker with the art form, make mistakes, and improve upon them as I went—not just follow the expert. Sure, there are certain tidbits I remember from his book (don’t dip the newspaper directly into the flour/water mixture), but mostly I was experimenting.
My first idea was to make a human skeleton, then hook it up to MaKey MaKey, so that every time you touched a different bone, it would tell you that bone’s name. (I still need a name for this project. Maybe “Paper Mache-Key MaKey”? I welcome suggestions.) I thought this would be a great project for a health, or science class, but the problem is that there are a heckuva lotta bones in the human body, and taking on a project of that size would be a huge time commitment—at least, if you wanted to do it well. So my idea changed to just the skull, and to keep the electronic element, I would have it recite Hamlet’s soliloquy.
This project is still underway, and I’m mostly figuring it out as I go, so you will have opportunity to see me work my way into many corners, and (hopefully) back out again.
 I started by balling up old newspaper until it looked about skull-size, then taped it up with masking tape. I didn’t worry too much about about the exact size or shape, because I’m guessing I can refine it later. Then I tore up a pile of newspaper into strips, and mixed up a flour/water concoction. I just went for a thick goop. No measuring here!
One thing I definitely remember from Dan is that you don’t want to dip the strips into the mixture, but rather “paint” the mixture on with your hands, which gives you better coverage, with less clumping and air pockets. This method worked great for me. I gave my newspaper ball several layers of paper mache, and set it aside to dry.
Even after all these years, I have a patience problem when it comes to giving my projects the full drying period they deserve. After a day and a half, my newspaper ball was taunting me to work on it, so I went ahead and sliced it open where I thought I might want to put the eyes. I probably ought to have given it another day to dry, but it wasn’t a huge problem. I pulled out the newspaper wad inside, and was left with an empty, mostly-hard shell.
 So, that all comes directly from Dan. But, for all his videos on how to make different monsters or dragons, I’ve never seen him make a skull (not to say he hasn’t). So, at this point, I was on my own, happy and ready to journey solo into the world of paper mache.
My first goal was to add the eye sockets to my shell. Why start with the eyes? Because they seemed like a good place to start. I cut out two egg-wells from a cardboard carton, and taped them in (loosely) with masking tape. It would have been easier with a hot glue gun, but I didn’t have one with me, so I improvised. I cut a strip of cardboard, bent it into a triangle, and that became my “nose.”
To really secure them, I plastered them to the main shell with more paper mache. Going into the project, I had thought of the flour mixture simply as a way to create the hard exterior, but found myself using it more and more as an actual bonding agent—and it worked really, really well. For this part, I made sure to give my work the full drying time it needed, as everything was held delicately in place, and these are going to be the prominent features of the project, so I wanted to get them right. By the next day, they were solid.
 To fill out the brow, I rolled/folded newspaper into what I guess I will call “pipes.” I taped them above the eye sockets, then gooped them up to really force them into the right shape. The bridge of the nose didn’t have quite the form I wanted, so I inserted another piece of cardboard to help make it a little more pointed. I was really focused on the details, trying to make my skull as realistic as possible, so I did a lot of tinkering around with these quick fixes to get everything just right.
One more round of paper mache, then I set it all to dry.
Alas, poor Yorick…
Check back soon for Part Two!
Tinkering with Arduino & MaKey MaKey
This one comes to you a little late, but that just goes to show how busy we stay at the Creativity Lab.
I got a better chance to tinker with Arduino and MaKey Makey at our (go figure) “Learn to Make: Arduino & MaKey MaKey” workshop. For those of you who are really familiar with the Maker Movement, you understand the importance of tinkering in learning. For the rest of you, you may not even know what exactly tinkering is, let alone its part in the making/learning process. This might give you an idea:
One of my third-grade science units was on circuity. Every day, for an hour, my class would spread out on the floor with plastic baggies of wires, bulbs, and batteries, and connect positives to negatives and negatives to positives, following the instructions of our photocopied textbook worksheets. It was boring, and formulaic, and frustrating when I couldn’t make anything happen, and the experience left me with an aversion to all things light bulb for years to come. That was 1996.
There was no tinkering in third grade. The worksheet was our Rosetta Stone. We could make the lightbulb work, or we could be wrong. Those were the options–and you sure as heck didn’t want to be wrong.
 So, eighteen years later, in the Creativity Lab. How were things different? Well, we pulled out the plastic baggies with the circuitry kits, spread out–and then we played. Tinkering means exploring possibilities and getting messy, rather than achieving some goal with a straightforward plan. Going into it, no one really knew how to use Arduino or MaKey MaKey (okay, maybe Aaron did…but none of the rest of us). I had a general idea of MaKey MaKey from a previous session, but not much. I still wouldn’t call myself any sort of expert, but here’s what I’ve gathered just from tinkering with it:
MaKey MaKey. Plug it into your computer and you can make any object that conducts electricity into a keyboard key. (MaKey MaKey. Get it?) It sounds complicated, but once you have it in front of you, it’s not so bad. If you open up a music making platform (like GarageBand or Soundplant), you can turn whatever you’ve got at your fingertips into an instrument. We had some avid Star Wars fans in our group, so we did some exploring, downloaded some sound files, dragged them into Soundplant, hooked them up to a homemade R2D2 via MaKey MaKey, and were transported to a galaxy far far away…We just sorta figured it out as we went. Really. That’s what tinkering does for you. Other possibilities? How about a custom game of “Operation”? (One group made a pretty cool Christmas themed version.)
The great thing about MaKey MaKey is that sense of awe. You kinda end up in a momentary Wonderland, where bananas are musical instruments. But, we’ve talked it over, here at the Creativity Lab, and have something of a general opinion that, after a while, MaKey MaKey by itself becomes more of a toy than a learning tool. Which is fine, but after you’ve replaced one object for another a few times to create a circuit, you want a new way to advance your thinking. So, we added “Scratch.”
Here’s a program that I hadn’t used yet. It’s a kid-friendly software that enabled users to tell stories with simple graphics. Click here and a cartoon cat pops up on the page. Want the cat to move across the screen? Just scroll through the different actions that are offered, “When space bar is pressed, move the cat 5 steps. When Up Arrow is pressed, make the cat meow.” And so on. Scratch is a real thinking puzzle. How can I use the different commands to create the perfect story? What else can I make happen? There’s good opportunity to go explore. Tinkering, ladies and gentleman. Tinkering.
That was the introduction to the programming. Then we pulled out Arduino.
 Arduino: Great and Powerful Oz of circuity kits. I kept hearing the tales of its awesomeness, but had never actually seen it in action. So, I was excited.
Arduino combined our programming with our circuit building. We plugged LEDs into breadboards, and connected them to computers (by the way, I had no idea what any of this fancy lingo meant a few weeks ago), then manipulated the programming to change what the LEDs did–change a number here, make them blink faster, change a number here, make them blink slower. That was pretty cool to figure out, but then I tinkered a bit more (the word of the day), and created a parallel circuit with multiple LEDs without even knowing it. Now, this one brought me back. See, I remember talking about parallel circuits, back in third grade, with the Great and Powerful Worksheet. But back then it was boring. Back then it was a waste of my time. I had no idea what I was doing, and I couldn’t have cared less. This time around, I was into it. I was solving problems, and figuring things out, and going off and trying new ideas on my own.
This time around, it was fun.
![]()
Making at a Glance: LCCS Expo
Lighthouse hosted its Expo Wednesday night, to showcase to parents what our students have been hard at work on this year. Check out some of the awesome projects the Creativity Lab had on display:
Journal-Making
For one of their first projects of the trimester, our seventh and eighth grade makers have been journaling—not writing in journals (though, they’ll be doing that, too), but making journals of their own.
 The making began by unmaking. Like biologists with their frogs, students dissected books to explore their inner workings. (We have some potential mad scientists at Lighthouse.) They studied the sewing and gluing involved in binding, and formed ideas on how they might replicate the process. Examples of different stitches were provided, but the students were left to determine what worked best for their projects by trial and error. (To practice their methods, they built prototype “art books” from the books they cut apart.)
I stepped into the Creativity Lab to peek at the work being done, and found myself awash in a sea of cardboard. The room had been transformed into an industrial, bookbinding center. Students waited in line at the paper slicer to trim their pages to size (half the length of printer paper), and a drilling station was set up to prep for binding. (Scrap wood was clamped to a table, to let the students drill freely without worry of property damage.) Keeping pages aligned during drilling proved challenging, but some students solved this problem by widening the holes. Clamps were provided, but, as anyone who has ever used a clamp knows, they can be frustrating when precision is crucial. A few students forewent clamps altogether. This did not prove advantageous.
Scrap corrugated cardboard was recycled for the journal covers, then everything was stitched together with yarn. With what time they had left, students decorated their projects. One student gave hers a pair of googly eyes, and another emblazoned his with a coat of arms. (One girl went to so far as to finger-crochet a small cord, which she used in combination with a dowel to latch hers shut.)
 Then the bell rang, and time was up. There came a unified “Aww,” and the Creativity Lab was picked up.
The students will use their journals to document their making for the rest of the semester. In other words: the next project can now begin.
This work is licensed under a Creative Commons Attribution-NonCommercial-ShareAlike 3.0 Unported License.
Thoughts From a First-Time Maker
On Thursday and Friday, we hosted a “Designing Making Experiences” session at the Creativity Lab. Makers from as far as Greensboro, NC joined us for the two-day intensive on creating maker-based curriculum for the classroom. As part of the session, participants were encouraged to work on a curricular project that they could bring back to their own maker-spaces. I’ll be helping to put on these professional development (PD) sessions over the next year. (That my first one came amidst the chaos of my first week was just a lucky bonus.)
Nine o’clock, Thursday morning, we gathered in the classroom. We said our hellos, noshed our sticky buns, drank our coffee, and then set to work, safety scissors in hand. I’m more or less new to the whole “making thing,” so I joined in where I could.
For two days we were back in time, at some point between kindergarten and twelfth grade. We made paper circuit murals and jitter bugs; scribble machines and soft circuits. Some of us worked with the 3D printer, while others tinkered with electronics platforms, like Arduino and MaKey MaKey…If you’ve no clue what I’m talking about then you’re exactly where I was three days ago. So, let’s back up a smidgen.
The paper circuit mural. Not too difficult, and it gives students a chance to make a working circuit—slightly more advanced and exciting than just gluing construction paper to a board. Here’s how to do it:
 Attach a battery pack to a sheet of foam board. Connect a strip of copper tape to one end of the batteries (positive or negative), and a strip of aluminum foil to the opposite end. Glue the two strips in a pattern across the board, making certain not to let the paths cross (this will cause a short circuit). We had prepped all of this beforehand.
Each participant cuts a design out of construction paper. Our group had a dragon, a squirrel, Rudolph, a few Christmas trees…I drew a pair of pants—just because I happened to be wearing some at the time. There’s not a whole lot involved with cutting out construction paper, but, for twenty minutes, everyone really put the effort and consideration into carefully crafting their pieces. It just goes to show the level of enthusiasm people have for the things they create. (And this was a group of adults, mind you. Imagine just how much ownership an eight-year-old might take in their project.) On the back of the piece, attach another strip each of copper tape and aluminum foil. Then, poke an LED through the front of the paper, and connect its positive and negative wires to the corresponding strips on the back.
Tack the pieces to the board, making certain that the two positive paths connect, as well as the two negative. If you’ve done it correctly, you’ll complete the circuit, and the bulb will light up. Ta-da! Like I say, not too difficult, though we did run into some road bumps. Short circuits are a common problem. (This happens when the positive and negative ends connect without the aid of the bulb, creating a “shortcut” for the electricity to travel across. Hence “short circuit.”) Also, make certain to keep the the paths exposed (i.e. don’t cover them with tape—metal must touch metal). And sometimes the thing just acts stubborn, but finessing our pieces into the perfect position became part of the challenge, and, by the end, our mural was twinkling. (For a more in depth guide to paper circuits and other projects, check out our Projects Page.)
 That was our introduction to circuitry. We took it a step further.
One group experimented with the 3D printer (they made Mickey Mouse keychain rings), while the rest of us played with software platforms like Arduino, and MaKey MaKey. I won’t say that you’re limited with what you can do using LEDs and paper circuits, but these programs really facilitate some cool electronic possibilities. I particularly like MaKey MaKey, which allows you to turn just about anything into a keyboard key (providing it conducts electricity). We used this software to turn grapes into video game controllers. Grapes. The fruit. As in, you squish a muscadine and Mario shoots fireballs. This is the kind of sorcery that we are messing with out here. (This Friday we are hosting another PD session, focusing exclusively on Arduino and MaKey MaKey, so I will cover them in more detail then.)
So, we were in a making mindset. And then something happened. Around this time the hands-on making sorta fizzled. We didn’t see much work on prototypes on day one. It was disconcerting at the time, but the good news is that first thing Friday morning everyone was eager and ready to create their curriculum and prototype. (So, maybe everyone had been tired from lunch, or still been absorbing all that they’d done that morning, but apparently this is a semi-regular occurrence at PD sessions, so you roll with the punches.)
Anyway, Friday rocked. Really. We had bins off the shelves, and people calling for more hot glue sticks. It was great to see so much of the making involve a spin on what we’d learned the day before. One maker incorporated a paper circuit into a journal. Another used MaKey MaKey to create an interactive poetry etching. (You probably had to be there to understand what that means. But it was cool.) The Mickey Mouse Keychain was fastened to a wooden car, and most of the projects had working LED lights. So we’ll call this PD a success, and celebrate.
And then it was over. We said our goodbyes, and cleared out.
Next session on Friday. See you then.
This work is licensed under a Creative Commons Attribution-NonCommercial-ShareAlike 3.0 Unported License.
One more thing before I go.
One year ago I moved from D.C. to Oakland, CA to be a Maker Ed AmeriCorps VISTA at Lighthouse Creativity Lab. Today is my last day of service. It is hard to decide what to share, but important to me, probably more personally than professionally. But that is beside the point. It’s like that old adage that says it’s about the journey, not the destination.
A little about the journey, starting here, with two pre-service notes I found in my journal:
11.15.13 3:19pm California The skylines here remind me of Doctor Seuss. I am so happy.
11.19.13 I need a year to explore, grow, go out on my own and develop myself for just a little longer.
And that I did.
Best moments.
- My first assignment: build a chair.
- Organizing the Creativity Lab.
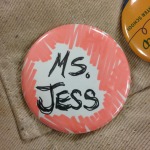
- My first button that I still wear – even if the pin back is upside down (causing it to constantly fall off)!
- My first maker’s first project, complete.
- My apron. But more so, Getting to be Ms. Jess.
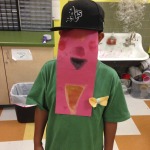
- Bow-tie face mask.
- Learning to solder.
- Lego hair.
- My sea of habitats with 2nd.
- Howard’s T for Maker Faire
- Maker Faire 2014.
- Building my first paper circuit mural.
- Organizing project in progress in the high school makerspace.
- Circuit blocks.
- Produce stamps.
- Finishing my making binder.
- Maker Ed send-off for our VISTA Leader.
Funniest moment caught on tape.
After about four hours of 3D printing (a VERY slow yet often rewarding process)… During a Designing Making Experiences professional development session.
My greatest challenge of the year.
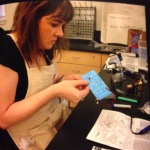
Soldering with 3rd graders. This was taken by Mr. V in the last half hour of a 6-hour back to back, small group power soldering session.
Martin discovers circuit blocks heat up.
I cannot express how much I LOVE seeing this one engaged so deeply. It’s the making, I am telling you. They love it.
Jocelyn’s documentary.
The moment when I realized I was making a difference.
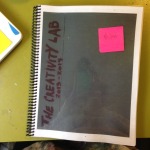
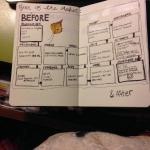
The Binder Project Year of the Maker: Before & After
When (or how) I realized just how much we had accomplished in a year.
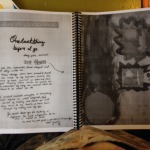
This is still a work in progress, hopefully able to be offered in e-book format for free to educators. Currently the printed hard copy lives in the Creativity Lab for our kids, teachers, and visitors to flip through for inspiration.
- The original version got a little too small.
- Year of the Maker:
- Before
- &
- After
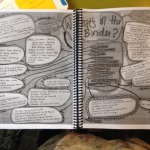
- 11 sections, split by genre, almost 50 project guides, and hundres of projects spread across 284 handmade pages.
- Mind mapping a table of contents works visually, but page numbers are still a thing to appreciate. Next edition.
- Dedicated to the North, East, and South.
- How it started…
- The first edition in print. 284 pages = 1st print job in b&w!
- One last thing before I go.
- Maker.
- The journals it took to make, aka the amount of Moleskines I filled.
- The Binder Project Punch List.
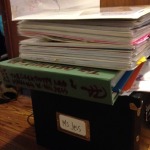
- The amount of data collected. The top binder was the final version, every page handmade and scanned in. The scanning and formatting took 83.5 hours.
- Planning the past.
11.20.14 Sometimes we don’t go back in our journals because we don’t want to know. We don’t want to know how far we had to come, how hard it was going to be, or how long it may still be taking to get there.
Melanie’s Song.
Wait for it, the last five seconds is everything.
I came across this anonymous quote yesterday and it’s stuck with me all day, so I think I will end on it. “We are all teachers, the questions is not whether we will teach, but what.”
I choose Making.
Thank you for the memories- Lighthouse, Maker Ed, and everyone in between. We are changing education for the kids we make with. The road ahead is long and rough but we will Make it.
Stamp Making, DIY Ink Pads, & Gift Wrap
In a perfect world I’d sit them all in two long rows, facing each other, scissors in hand, able to look up, across, or over for help and we would walk through cutting tightly curved lines. But what world is perfect anyway? Welcome to making with first graders.
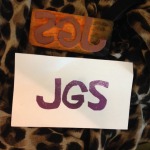
As a fun introduction for making Making Journals I decided to try out stamp making. I wanted to have the kids make a stamp with their initials that they could use throughout making and in their making journals. The stamps took only two days to make (one hour per day) and regardless of the challenges, ended up being pretty awesome.
Day One: Making Our Stamps
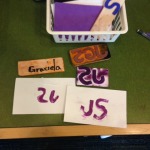
- My sample / demo stamp… without which I would never have known how important mirroring the initials would be…
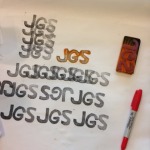
- Demonstration samples, showing why mirror imaging matters with letter…
- Basic stamp making supplies…
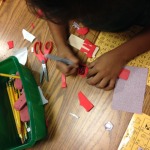
- Writing on initials and forming our stamps…
- Helping our friends when we have finished!
Materials Day 1
- Scrap Wood, we used shims (one per student)
- Adhesive-backed Foam (one 3×4″ piece per student)
- Sharpies, which did NOT work as imagined, they bled (one per student)
- Sandpaper (one 2×3″ piece per student)
- Scissors (one per student)
The Gist of It
Write initials on the WHITE side of the foam, thicken them, cut them out, peel off the white part, stick on to wood in reverse order (mirror imaged), sand wood down using fingers to check progress.
Tips & Tricks
The sandpaper is a great tool for distraction while you (as making instructor) try to balance helping all 24 or so kids get to the same goal. When they say they are done I ask them to rub their fingers along the wood, saying, “is it bumpy or does it feel smooth?” That seemed to motivate them into becoming fine artisanal bevelers, in addition to the stamp makers they’d already become.
As luck would have it, 11 minutes before making was supposed to start I realized one small stamp pad per table just wouldn’t be enough to keep these eager makers engaged. I managed to invent a new DIY stamp pad using wet sponges, an old deli container, and watered-down tempera paint. They worked like a charm and the kids used them side by side with the six ink pads I did have – some of which were dried up, luckily a little water brings them right back to life.
Day Two: Stamp Testing and Redesigning
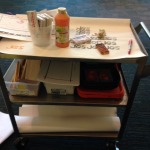
- Making cart ready for day 2…
- Stamping samples to spark ideas…
- DIY Ink Stamp Pads!
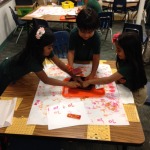
- 1st Grade Stampers…
- Someone found a glue stick cap and tried it out, she saw me see her doing this and looked to be expecting me to say that was wrong, I just smiled at her and said, “I like it. Just make sure to wipe it down when you are done.”
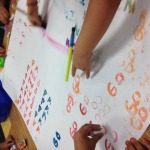
- Stamping in action…
- Stamps by 1st graders!
- Paint striping under the stamps, loved this…
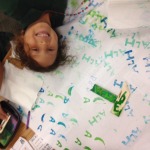
- Very happy stamper…
Materials Day 2
- Homemade Stamps (one per student)
- DIY Ink Pads: container, two wet sponges, watered down tempera paint (one per table)
- Ink Pads (washable, one per table)
- Poster paper (one per table)
- Foam & Paint Brushes (for over-sized stamps and testing new methods or patterns)
- Paper Towels for blotting
- Water and a spare sponge or paper towel to refresh dried up ink pads
- Cleaning wipes
- Spare Foam, Wood, Glue, Sharpies, Scissors for Re-designing needs
The Gist of It
Test stamps (try creating patterns, flipping stamp, using a brush to apply paint if needed), fix stamp if initials don’t print in the right order or facing the right direction, 15-20 minute cleanup time, circle up to discuss challenges and discoveries.
Tips & Tricks
Rotate colors every so often between tables (my DIY stamp pads were the same at each table, but I swapped out the small ones a couple times during the hour and it THRILLED them.
Some students ended up with over sized stamps from day one, when I saw them struggling I gave them a paintbrush without explaining how to use it. Then after the first 15 minutes I gave each table one foam brush and one paintbrush- not enough for each student, encouraging sharing. I told them to experiment, rather than paint. When I caught a few trying to paint we talked about how the paper was too thin for water, comparing the stamped sections to the painted, and suggested they try other ways to use them.
So Many Lessons Learned
- Cutting around curves of letters is hard! 1st graders WILL need help with this.
- Feeling what we are sanding is how to check our progress.
- ‘Thickening’ is not a word 1st grade understands. I might try stencils and larger letters / wood next time or simply spend more time talking about how to thicken our letters for cutting.
- Mirror imaging is tricky for everyone, using the white side of the foam allows for less confusion. Next time I would bring in mirrors on day one so the students could use them to check their stamps.
- Initials is a word we don’t understand yet! And it is a concept we don’t yet grasp. Plus sometimes names change and that is confusing. Having a list of student names will help if you aren’t familiar with the kids.
- Hard is okay as long as we can eventually succeed. One of the first grade teachers (new to making) instinctually began cutting out her students letters for them. She was worried that it was just too hard for them. After day two we talked about the ideas of failure and how perseverance through struggle is at the root of making, so long as they can actually accomplish the goal in the end, the struggle is where they learn the most. In this case, the letters may have in fact been a little too hard, or perhaps we should have just used one. I will say many of the kids ended up just taking little pieces and sticking them together to make up their letters, which where butchered in the process, and they turned out great. They had success and I watched them learn to adapt a process to fit their abilities. As long as they CAN reach the goal, hard is good for them.
- It always takes longer than you think it will and different groups move at different paces.
I know a lot of people fear the messy, especially in a classroom full of kids. It is work, but I am pleased to tell you this messy looking making was pretty easy to clean up. Especially when you enlist mini-cleaners to help!
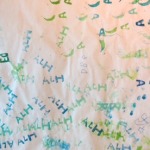
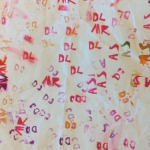
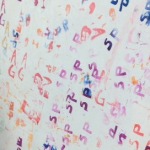
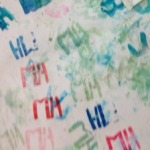
Hand-stamped Gift Wrap! It wasn’t until they finished these and I saw them in a pile to toss that I realized they’d be amazing custom gift wrap once dry. Amazing fundraising opportunity. Place your custom order now!
Next week the first graders are going to see their printmaking skills turned gift wrap. I’m thinking it just might boggle and expand their creative little minds!
Lava Mae Site Visit
It started with the Creativity Lab director presenting us with the idea of teaming up with the non profit organization, Lava Mae whose motto is, “Delivering Dignity one shower at a time.” We all were immediately excited and honored to get to have this wonderful experience offered to us and we got started.
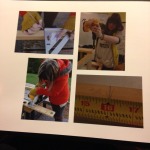
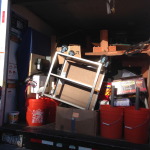
Our task is to come up with an awning design that will be attached to the bus and will provide coverage from the rain and sun. This image was captured on-site where we took measurements to further our project. Our design constraints include not making the bus any wider as well as well as creating a design that will be versatile and will provide shade wherever the bus is located (there are different obstacles depending on where the bus parks). We will be meeting twice a week and collaborating with each other to start improving our original design.
This post is the first in a series from Jocelyn, our first student contributor.


