Making (in School): A Letter of Recommendation
I have spent the last nine months deeply submerged in Making (in School). When given the opportunity to share what I’ve seen, I never feel I can share enough, perhaps because the nature of the idea of “Making in School” itself is so grandiose. There are so many facets to it, so many ways to look at it. Not to mention the oh-so-many ways we (as learners) need to receive information in order to process it, understand it, and use it.
Which brings me to… Learning Deeply.
Making is a way of interacting. Using our hands to create. Combining the fields of art, technology, craft, science, math, and humanities into something personally driven. Making can be as simple as sewing, or as complicated as building a robot or programming an Arduino. The goal of making is making, but the rewards of making show up as deeper-learning through persistence.
At the heart of learning new stuff is a connection with what we are learning, allowing us to completely immerse ourselves and experience flow. Personally, I never realized just how much I loved learning until I was learning about what interested and inspired me. Making allows kids to connect with what matters to them and apply it to the expanding world around them.
Making insists upon deep learning. It is rooted in open-ended (choice-based) projects, driven by personal interest (student-driven).
Learning to Make
The idea of making in school to most educators (I’d argue to say) is intimidating and difficult to imagine without a little exposure. The kind of exposure we’ve been developing and providing over the last 9 months at the Lighthouse Creativity Lab. With the introductory awkwardness of trying a new technique and (perhaps) the intimidation of feeling like a non-maker brushed aside, we’ve created space for teachers to learn deeply.
In our professional development sessions, I have seen time and time again (96 times to date to be exact), that a gentle introduction into making, over a brief training or coaching session, results in every teacher being on board with making in school.
Teachers are relentless lovers of learning. They want their kids to learn deeply more than anyone else.
Where to Start?
If you want to make in school, do it! Use anything you have, integrate it with standards or don’t. Either way your kids are going to be transformed. Sometimes it is easier to start with making for the sake of making, curriculum integration might be easier after you submerge yourself and see the impact of making in your classroom.
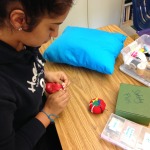
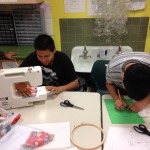
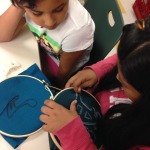
Start small and expand when you are ready. One loud-and-clear takeaway from our kids at the Lighthouse Creativity Lab is that hands-down, K to 12, they love sewing. Sewing is one of those things that can be adapted across every age- not to mention one that results in perseverance, illuminating confidence, and pride. Making builds character.
Adapting Making for K-12 Settings
Sewing across grade levels looks something like this at Lighthouse Creativity Lab:
K: Burlap & Plastic Sewing Needles – Try integrating Design Thinking by having students create stuffed toys for each other letting empathy guide them.
2nd Grade: Felt & Dull-point needles – Have the kids make Story Puppets based on a character from a book they’ve read as a class.
5th – 8th Grade: Fabric & Hand Needles – Start with pillows and expand to sewn circuits (using conductive thread) or Makey Makey integration (introducing programming through Scratch).
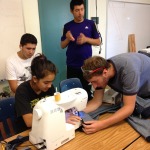
High School: Fabric & Sewing Machines or Sergers- Introduce new tools and have students make wearable clothing using technology (like Flora-Arduino programming), perhaps requiring that it reacts to their environment (for example, a shirt that lights up when it hears loud music).
No matter what kind of making you start with, I can promise you that once the kids get the concept of making, the ideas of what to make next will flow endlessly from them. Your role then becomes “coach,” presenting new challenges and obstacles. Making something simple that they can relate to (such as a pillow, which we all use regularly) not only gets them to realize that everyday objects were made by someone, but that they are totally capable of being that maker.
I’ll also point out here that most of our kids have been taught in a system that has ingrained in them an “is this right” slash “I can’t” reflexive way of thinking. In life, answers do not come in cookie cut forms. I always tell them that they can and they will, and you know what? They do.
So with that said, here are three seeds I would like to plant, a sort of ever-growing approach to Making in School. One: Materials as Constraints, two: Documentation as Proof, and three: Critique as Conversation.
Making projects should be open-ended and student-driven. Yes, it sounds like a lot of freedom but the kids can handle it with repeated exposure. I promise. Open-endedness involves leaving room for students to make and act on choices (living with them and working through them). Those choices could include materials, or topics, or design challenges (make something that _____, then test it, rebuilt, and test again). Student-driven projects are those that encourage using personal interest as a motivator and they are the sweet spot of making in school.
One way to create open-ended projects is to let the materials serve as the choice, but what happens when we use materials as constraints? Deeper learning. When you give a student something they’ve never seen, nine out of 10 times they will say they don’t know what they can do with it. With a little coaching and some brainstorming, their creative minds will expand right in front of you.
Here are a few ways to try material constraints in your classroom:
- Using materials they already know in a new way, for example Tissue Paper Painting (no scissors but choice of adhesive options and a pencil as their only tool)
- Unfamiliar materials as a means of expanding creative thinking
- Limiting materials (like pick two from five options) as a way to encourage making choices and committing to them
Just the other day I was having a conversation with my roommate who’d gotten a new, beautifully-bound leather journal from a friend. He told me he wanted to use is as a place to keep his recipes, but that he was afraid to start because of the possibility of messing up. Somehow we got on the subject of journals and tearing pages out of them. He told me about the last journal he’d had and how he’d torn out a bunch of pages because he’d tried to do some drawings on them that (he said) weren’t any good.
We’ve all done this- throwing away pages because (we believe) what we put on them wasn’t good enough to even exist. My response to this is: what does that say to ourselves about how we think of ourselves and our work? How bad does an attempt have to be that it can’t even exist in a journal on our shelf?
Journals are for freedom from judgement, not another place for us to be too hard on ourselves. Documentation of process is a critical thinking tool and results in a story we can share with others. They are living (if we let them) proof of our progress.
Ways to integrate documentation into your classroom:
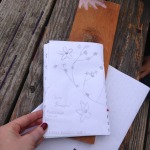
- Have students use journals, sketchbooks, list-making, and/or blogs to catalog their making process – it can be as simple as this, using only card stock, copy paper, a binder punch, & twist ties
- Aside from journals, cameras are a great way to document process. If you can keep a couple cheap digital cameras on hand, many of them will take advantage. Setting up a documentation station is even better- students can directly blog their progress, joining a web-wide world of makers, all the while exposing them to 21st century tools.
- Take pictures of their progress. As a documenter of making in schools, when I see things that I like, (concentration, focus, passion, uniqueness exuding from kids), I take a picture. It is like a reward or a compliment. Taking a picture of their work says to them, “Ms. Jess thinks this is good, maybe it is.” I also ask questions, like what made you choose that? Are there other materials that might work better? How will you finish it? Have you tried using a palette knife? How much is it worth?
I myself like to do my creative work (especially painting and writing) without an audience and I respect that many of them may feel that way too. So I wait to use this technique until they are comfortable with my presence, as a viewer of their work.
No matter how documentation of process occurs, it all leads to a bigger idea. Through journals, photographs, blogs, or a combination of sorts, documentation serves as evidence that our trials and tribulations mattered. We can go back and see how far we’ve come. We have proof. Proof that we can use to further develop our own skills with and proof that helps us share our process with others.
If you didn’t go to art school, this may be a new idea. One of the things that makers need is feedback. It allows for faster growth and expands our minds to possibilities and conclusions we may not have come to otherwise. Without feedback we can get stuck.
Critique is hard and awkward at first. Fact. Students are not used to being asked what they think, so a good place to start is with what they know and see.
What Critique in K-12 might look like:
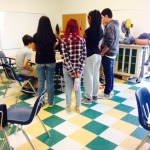
- Circle up your kids and have each student share their project. This can be done at anytime in the making process and is a motivator when used at the end of making. Have them introduce it briefly and tell the group anything they’d like them to know about what they’ve made. At first it might be a lot of “this is what I made, yea, uhh, that’s all, oh and this…” Ask the other students to share what they like about it. At first they will generally say, “it’s cool, I like it.” Gently let them know that cool does not describe what you like about it, ask them to describe why. This should lead to smartalecs correcting each other, saying, “cool doesn’t tell us how you feel about it.” But even with the sarcasm, they are catching on to the concept so keep going. Have the kids ask questions about the project, prompt them to find out more about what they don’t understand, or what they would like to know how to do. Encourage and require them to wonder.
In general, at the K-8 level, sticking to the positives would be my suggested best practice. Once they are developed and comfortable as makers you can begin to have students explore sharing suggestions, or ideas about how a project could be enhanced. I think most high schoolers (that have already been familiarized with positive critiques) can more than handle this. I also think they appreciate it.
Critique can be painful if not framed positively and the teacher plays the role of facilitator. No matter the grade, kids love sharing what they have made and seeing what their peers have made. By making critique in the classroom a conversation, students learn how to communicate in a world that easily allows for passive aggressive problem solving (like complaining on Yelp instead of asking a restaurant to fix an order). Inter/intra personal communication skills can be learned and they need to be practiced.
Critique helps students learn to develop dialogs, have conversations, provide empathetic support to others, while also learning to ask and receive help from others. Modified K-12 critique is a launching pad for crucial life skills.
Why it Matters
A fellow Maker Ed VISTA sent me this quote by Frida Kahlo via snail-mail. It reminds me that life, like making, is about (human) connection.
“I used to think I was the strangest person in the world but then I thought there are so many people in the world, there must be someone just like me who feels bizarre and flawed in the same ways I do. I would imagine her, and imagine that she must be out there thinking of me too. Well, I hope that if you are out there and read this and know that, yes, it’s true I’m here, and I’m just as strange as you.”
Making is part of our history. Everything we have, use, taste and touch was made by someone or something. Something so naturally ingrained in our culture and ancestry should also be critically woven into our schools.
And not just after-school, when kids are mentally exhausted, but during school hours too, while they have their fullest learning potential engaged. I leave you with a challenge, make something, make anything. And then try to incorporate that something into your classroom, with or without curriculum. Consider it a learning experiment. See what happens. Then, and only then, decide for yourself how powerful making in school can be.
Originally written for Maker Education Initiative on behalf of The Creativity Lab is located in Oakland, CA at Lighthouse Community Charter School.
Summer of Making Highlights
The Summer of Making at the Creativity Lab was jam packed full of wonderful ideas, great projects, building, making, and a lot of fun! Here are some of the highlights captured on video.
Student Project Spotlight
This post is to highlight the projects students completed in our Installation and Community Projects week. Students were told to design and build a project for the school or their community using the skills and techniques they had learned this summer. Here are some of the projects from that week.
Helping Build the Makerspace: Skill Building Without Pressure
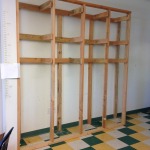
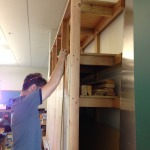
I led a group of students in building storage for the makerspace. Together, we built a large rack for storing lumber and a rolling toolbox/whiteboard combo.
Obviously this was very helpful for Lighthouse School. The high school makerspace is currently a multi-function room -a common scenario for makerspaces in schools. It is shared by the science teacher, art teacher, making elective, robotics class, and after school making program. They really needed some extra storage, especially after we bought a bunch of metalworking equipment.
Having the students help build these structures made the students feel ownership and pride in the space. I didn’t quite feel comfortable having them fully design and build, especially in California with earthquake concerns. So I settled on designing the rack myself, and having students do the majority of the cutting and drilling.

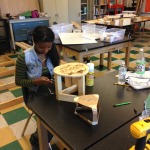
The lumber rack served as a skill-building project for our woodworking week. While they were drawing out designs, students were called out in groups to learn to measure and cut parts on the mitre saw. Once all the parts were cut, groups then learned about pre-drilling and screwing by building the various frames/shelves. This way, students could learn without the fear of ‘messing up’ their own materials. There was a group of six students planning a very ambitious project. They are designing and building a trophy case for the school. During their design phase I often borrowed a few to add new parts and learn about strong construction techniques. Students would bring back these lessons to their trophy case design meetings, and improve their individual project.


During the final week of camp, there was one student who was a very motivated builder, but had trouble coming up with ideas. After a day of indecision, I talked to him about building some tool storage. He decided this was a great project, and built an amazing lockable box that perfectly fits Lighthouse’s new metalworking tools.
Work-in-Progress: the process of making ideas a reality
Throughout the summer making program, we used several techniques to help students develop their ideas at different stages of making. The processes of drawing, prototyping, and documentation are just as important as the actual ‘making’ of a project.
1. Journals: Initial ideas, sketches of designs, lists, a working book that keeps everything organized.


 Every student on the Summer Making program had a journal to sketch, write, draw, stick, and paste their ideas. One of the most crucial things we learned from using journals is that students need LOTS of prompting to use their journals, but once they “remembered” that they had a journal they got used to using them and they were a great tool. As well as developing ideas, the journals were also used to referring to what students were thinking yesterday/last week/at the last session. A lot has happened since the last session (both to student and teacher), and a reminder of where you were in the process, especially when projects are still conceptual, is very useful.
2. Models: 3D sketching, concept models, prototypes, test-builds.


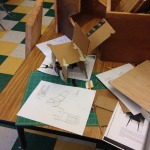
 I can’t stress how useful making a concept model is for solving problems and refining designs. For example, in wood-working week, students’ chair design ideas were elaborate and diverse, and many of them were ready to get making after making a few sketches. Before moving to the next stage (making in wood) students were forced to make a cardboard model. This was not a popular technique with the students at first. However, they soon realized how important a test-build was, because every single design was changed before moving on to a wooden version. Models were also used as props to refer to and further ideas. Cardboard models are invaluable for visualizing problems that are not clear on paper. We applied the same rule to laser cutting -students could laser designs they wanted, but needed to test in cardboard first.
3. Documentation Station: Photograph, blog, tagging.


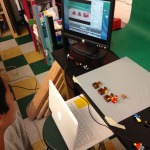
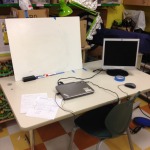
 The documentation station was integrated into part of the development process. In each room, we set up a computer, camera, and a white board backdrop, where students would take photos of work and write tags and labels for progress and finished work. Students would take photos of the work as they progressed to a new stage in the process. They could immediately post to a school-run Tumblr by using the inbuilt camera and a monitor (Tumblr allows you to upload a a photo directly to a post). This way, our young makers became acclimated with documenting, tagging, and sharing their work and process.
3dPrinting- Make Something Cool: Expectations and Reality
What is the problem?
3D printing looks and sounds really cool. It instantly gets people’s attention no matter what age group. It also takes a long time, is prone to error, is not an intuitive process, and the learning curve for 3-d modeling is very steep. What one can actually make on a 3D printer is often far less cool than the idea of what a 3D printer does. Making a fully realized plastic thing out of tiny layers is amazing. Making a little bit of plastic that doesn’t look like anything isn’t necessarily as cool.

What happened?
Students would often dream big, then become frustrated at being unable to make the shapes they envisioned. Even when using Tinkercad, the simplest free modeling program we could find, it was hard for our middle school students to design 3D models. Precise sizing and movement was difficult, even with snapping to grid measurements. They had lots of issues with placing things in the wrong planes of height/depth. There were some students who could master the program, but spent so long modeling they ran out of time to print. Bugs, glitches, and failed prints finally torpedoed many students’ hopes.

How do we fix it?
Start Simple. The most successfully printed object was a small, and mostly flat, necklace pendant. It did not take long to design (2 hours) or print (5 mins). It looks exactly on the computer as it would printed. When the print did inevitably mess up, we could start again without much lost time. It was a simple project with many routes for expansion, which could be explored in further projects. It was practical -it could be worn, and be a source of constant pride for the wearer. He was even able to stay late one day, and printed copies for friends and teachers.


Building Circuits with MaKey MaKey
 We spent a week using the MaKey MaKey and Scratch to create interactive instruments and controllers. The MaKey MaKey is a kit that let’s you interact directly with your computer to control the keyboard and mouse. The week was popular with students, and in 5 days they learned the concept of circuits, programming, and made some cool things! Students had an hour and a half of class per day, and it was structured as follows:
Day 1 -Introduction -We started with a class activity: making a human orchestra, then watched inspiring films (we watched the kickstarter film and a film of music examples), unboxing the MaKe MaKey (most students jumped straight into building circuits using the well documented instructions), introduction to Scratch
Day 2 -More inspiring film watching, more Scratch, making paper piano.
Day 3 -Inspiring film watching (again), making your own instrument or controller.
Day 4 -Continuing making instruments and controllers
Day 5 -Finishing instruments and controllers, and presenting work to the group.

 At the end of a week making circuits with the MaKey MaKey, one of our 4th Grade middle school students made an interesting observation that I thought I would share. Yareley, who is an excellent maker and came to everyday of the 5 week camp, saw a box of e-waste by the classroom door that was going to be recycled. She picked up a hacked fragment of a mother board, and pointed to it, “Ms Becca, when you said we were going to be working on electronics this week, I though you meant we’d be doing something hard like this”.
She was pointing at the microchip, and she was right: it did look like something “hard”, foreign to everyday vocabulary of things. Probably, Yaraley had seen many of these in her 9 years, in fact, these “hard” things (i.e. microchips) are part of her everyday life in most electronic devises she uses on a daily basis.
She continued: “but actually it was not that hard at all, and quite fun”. She was referring to the week of programming in Scratch and using MaKey MaKey pins to create circuits.
She was holding a MaKey Makey in her hand, as she was so excited about them that she wanted to borrow one to play with over the weekend. I asked her to look at the MaKey MaKey and turn it over. She did. The back was almost identical to the hacked up circuit board she had pointed to moments before. She smiled with pride, “Oh! It is hard!”.

Cutting Tools and Young Makers
Kids of pretty much any age can use tools. Determining which age groups can use what tools (with what kind of supervision) is the trick. When do you trust someone to use power tools? When do you trust a student to cut without supervision? In this post I will talk about cutting tools used in woodworking. Here are some thoughts based on our experiences at Lighthouse.

Japanese Saw- The japanese style handsaw is much easier to cut with than the European counterpart. It cuts while pulling towards the body, which helps keep the blade flat and straight. The saw cuts best when the saw is not being excessively pushed or forced. Use of strength is not necessary, and is in fact counterproductive, to quick and accurate cutting. Young makers (5-10+ yrs) can use a Mitre Box to help maintain a square edge. These saws can be used safely with minimal supervision at any age.
Battery Powered Circular Saw – A battery powered circular saw is a good tool for middle-school aged makers. The saw must be held with two hands, eliminating the possibility that a stray hand gets in the way of a stray blade. The motor is not powerful enough to pinch and create kickback, unlike a corded saw. Using a Square to draw a straight line helps students create square edges. After a few supervised cuts, most students can begin to make cuts on their own. Goggles should be used at all times when using power tools.

Mitre Saw – Also called a Chopsaw, used by middle school and high school students, and requires an adult present at all times. Students should be instructed on how to hold and move the saw, then do some ‘dry runs’ without wood to get used to the noise. Goggles should be used at all times when using power tools.

Jigsaw – Since the jigsaw is best for curved cuts, it is a more specialized tool than the other saws discussed here. Most young/new makers making simple projects (boxes, stools, small chairs) only need straight cuts. The few students who need to make curves can be individually instructed to use the jigsaw after learning to make other cuts. Goggles should be used at all times when using power tools.


Table Saw- The table saw should only be used by advanced high school makers. They may start by making cuts on medium sized pieces of plywood, and only later move on to making longer rip cuts. Make sure the guard and push sticks/blocks are used at all times. With the amount of time we had this summer, I felt more comfortable making the few necessary table saw cuts and having students catch the offcuts behind the saw. I wore goggles, because I don’t like wood chips in my eyes.
Summer Making (Part 2) – Woodworking & Installations!
Summer making in the Creativity Lab was wildly successful. It lasted 5 weeks and taught more lessons than can be contained in one digestible blog post so here are a few bites-sized morsels:
- The impact of concentrated making over time on students is visible. The results include increased confidence, creativity, and resourcefulness.
- Talking about what they are making helps students learn how to relate to others and how they are perceived by others, not to mention that it teaches them how to have difficult conversations. (Communication & Inter/Intrapersonal Skills)
- Students do not know their worth in money when asked the value of what they’ve made, but once they do they get a little swagger in their step. And they take on the teacher role, challenging themselves, the ultimate victory.
- Mentors, extra hands, and feedback (a.k.a. critique toned down) are resources to be welcomed and used.
- Learning to ask for help, perhaps my favorite silver lining and probably one of the most valuable lessons of all.
Week 4: Woodworking
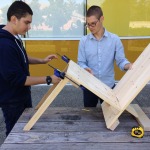
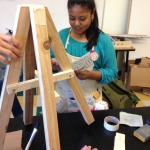
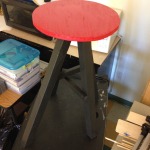
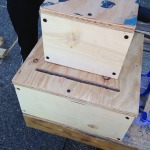
Stools, boxes, & chairs!
Pricing Your Furniture (while integrating curriculum)
I asked Juan what he thought his chair was worth, he said, “$25…”
So I said, “$25 what…?”
And he said, “dollars.” As I mentioned in lesson 3 (see above), most of our kids don’t know the value of money, let alone the value of handmade furniture. So I went on to ask how long he had spent building that chair, we worked it out to be about 25 hours, meaning he was charging $1 per hour, without factoring in material costs, labor, and so on. Ms. Becca (making instructor) all this and chimed in to add that he’d also neglected to add on a design fee. In the end the three of us worked out the value of his chair to be somewhere in between $300 and $400. His face was priceless.
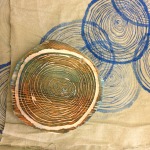
Laser-cut Stamp for Printmaking (tutorial):
The Amazingly Diverse Body of Week 4 Work:
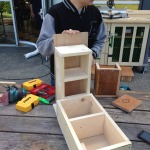
- Stools and boxes
- Building a pen / material storage box for his room
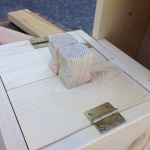
- Hand-widdled knobs
- Staning the wood
- Custom supply storage
- Lasercut stool
- Lasercut stool, prototype, and design
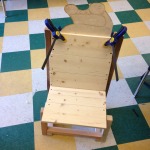
- Relaxing chair in progress
- Relaxing chair
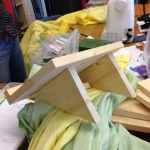
- Table building
- Table complete
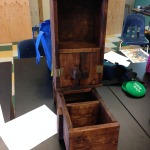
- Card box to match the cake for her quincinera
- Card box complete – but how can you remove them?
- Chair prototype
- Assembling chair legs
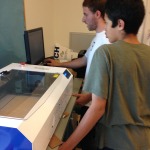
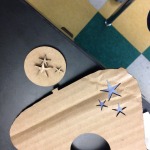
- Lasercutting the final touches
Week 5: Installations
In the final week the kids were asked to create something permanent for their school, a sort of modified-for-the-classroom Design Thinking model. And so they did…
Curtains, tables, trophy cases, lumber storage, signs, hall-passes, recycling videos, and more!
Ernesto’s Recycling Animation
The kids did stop-motion animation during week 2 and Ernesto (a middle schooler) really took to it. He decided to make an animation about recycling, as related to the San Francisco Bay Area.
During the editing process Aaron (making instructor, and no, not Mr. V) was working with Ernesto, trying to explain the concept of Context. Making-teacher breakthroughs are always exciting to see, when recounting it for us after all the classes wrapped up, Aaron said, “I told him that context is the thing that makes you understand, or feel related to, what is happening in the movie.”
Teaching making involves explaining complicated ideas as simply as possible. And I would say by the final edit, for both Aaron and Ernesto, that was a success.
An Installation of their Installations (or something like that)
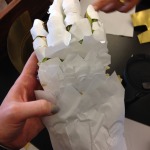
- Hand armor prototype
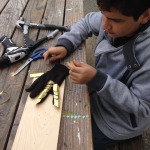
- Cutting and attaching metal ribs to gloves
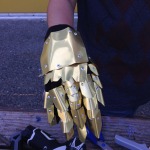
- Hand armor
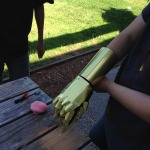
- Adding a wrist shield to the armor
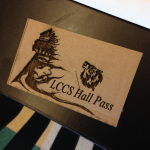
- Lasercut hall pass
- Testing curtain techniques
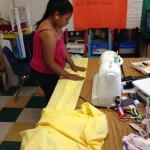
- Sewing curtains for the high school
- Adding the curtain facets
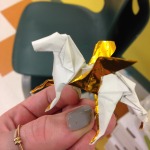
- Oragami genius
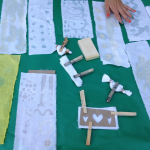
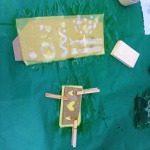
- Lasercut block printing for fabric
- Lasercut block printing for fabric
- Stop Motion Animation on Recycling
- Animating the Recycling Process
- Editing his animation
- LCCS laser cut plaque
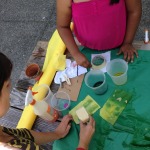
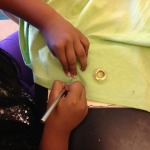
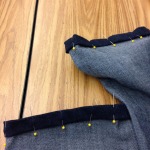
- Learning to pin pants before sewing
- Hemming pants at the request of her mom!
- Hemming pants at the request of her mom!
- Hemming pants at the request of her mom!
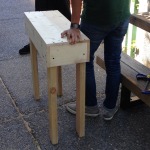
- Side Table
- Music Stand
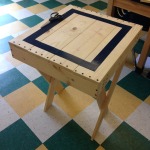
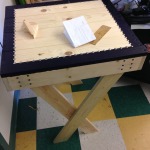
- Push Pin Table
- Push Pin Table
- White Board / Tool Rack with Storage Bins
- White Board / Tool Rack with Storage Bins
- Trophy Case
- Wood Rack
- Wood Rack
One Final (and very important) Matter
HUGE thank you to Becca Rose and Aaron Strauss, our Maker Corps summer making instructors without you, this would not have been possible.
![]()
This work is licensed under a Creative Commons Attribution-NonCommercial-ShareAlike 3.0 Unported License.
Summer Making – Fiber Arts, Animation, & Makey Makey!
Over the last three weeks I have watched one of our regular drop-in makers, Yarely (a 4th going on 5th grader), go from making very simple, crafty, step-by-step projects for kids to making projects that blow away her 7th and 8th grade summer making peers. I bring this up for two reasons. First, when a child connects with themselves as a maker, a visible shift is made. Not only in the quality or type or style of work, but in the creative process behind it. There is a sense of pride and confidence attached, which brings me to reason number two. When a child isn’t exposed to making, the introductory process takes time. Figuring out how to start, how to find an idea, how to try through failing is hard work. It takes persistence and patience to figure out how to sketch out or prototype an idea, how to narrow your options down when looking at material choices, or how to use something like a box cutter.
Not every kid approaches making ready to put in the tremendous amount of effort making will require from them. But sometimes that’s okay, the exposure to making is an opportunity in itself. This brings me to the work from all the kids over the last three weeks. Becca Rose and Aaron Strauss (our summer making instructors) have brought Summer Making into full swing at The Creativity Lab.
I have tried to include video as much as possible to give you a real sense of all this making in school stuff. Some of the work isn’t great but I still documented it, not only to share it with you (and provide a range of what you can expect in your own classroom), but also to let the kids know that I think what they are doing is important. It is in the process of making that we learn the most. So, on to week one!
Week 1: Fiber Arts
Tie-dye, embroidery, and sewing!
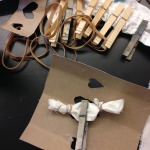
- Clothes pins, rubber bands, and cardboard
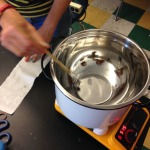
- Melting wax to for a resist technique
- Flour resist technique
- Pre-dye
- Fade technique with two colors
- Fade technique with one color
- T-shirt
- Spray bottle application!
- Resist technique tests
- Tie dye scarf
Week 2: Animation
Creating animations using stop-motion! Some chose to work in groups, others solo, most used story-boarding to get going, some made props, and others stuck to whiteboards.
- Animation props
- Animating…
- Editing
- Storyboard
- Animation props
- Using Monkey Jam tutorials
- Modeling clay that works to stick objects to a whiteboard!
- Animation props
- Animation set-up
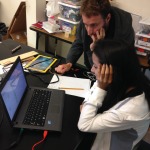
- High school animation critique
- Animation props
- Middle school animation critique
- Mandala
High School Animations
Made using a very affordable software (under $20), the high school makers worked on Macs using iStop Motion to create their short animations. Here is what they came up with:
Middle School Animations
Made using a FREE software, the middle school makers worked on PCs using MonkeyJam to create their short animations. Here is what they came up with:
Week 3: Makey Makey
Instruments and controllers using Makey Makey!
- Controller
- Piano in progress
- Makey Makey
- Pencil
- Lasercut details
- Keyboard with glove
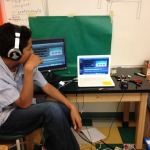
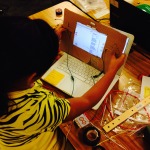
- Programming
- Videogame controller
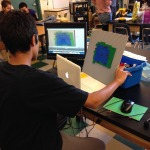
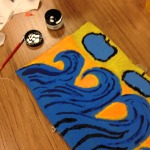
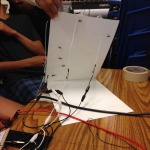
- Conductive painting
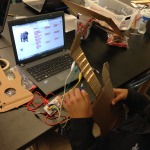
- Programming his guitar
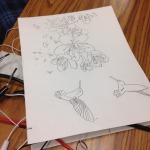
- Sketch for conductive painting
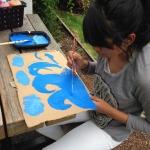
- Conductive painting in progress
- Conductive drawing (back)
- Conductive drawing (front)
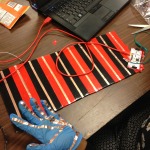
- Videogame mat
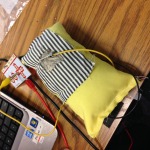
- Conductive pillow
- Conductive painting
- Piano
Middle School Makey Makey (please forgive the sound quality!)
I will end with this: if Yarely, at 9 years old, is making pianos from scratch where will she be as a senior?!
Special thanks to Becca Rose and Aaron Strauss, our summer making instructors!


