Project Guide Sneak Peak!
Projects to make and share, worksheets to use, and probably spelling still to be fixed. None the less, many of our tried and true K-12 making project guides are up for you to use.
Keep an eye out for new project additions on the Lighthouse Creativity Lab projects page.
- Making Journals – Middle
- Making Journals – High
Project guide PDF Files can be downloaded here:
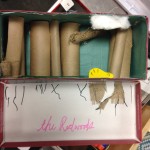
Adaptable Habitats and Animals
Making Journal Extension Hand Sewn Binding
Making Journal Extension Hand Stitched Detail
Making Journal Extension Tissue Paper Painting
Worksheet PDF Files can be downloaded here:
Adaptable Habitats and Animals: Shoe Box “Fabrication”
Adaptable Habitats and Animals: The Rocky Shore
Adaptable Habitats and Animals: The Creek
Adaptable Habitats and Animals: The Open Bay
Adaptable Habitats and Animals: The Salt Marsh
Making Journals High: How to blog
Creative Commons License
This work is licensed under a Creative Commons Attribution-NonCommercial-ShareAlike 3.0 Unported License.
Shaping, Cutting, Connecting for Kids
What do words like woodshop and woodwork bring to mind? For me, it’s always been the hand and power tools one uses that I think of most easily. For kids in some of my afterschool classes, that’s been pretty much the same case. When I asked Kindergartners and 1st and 2nd graders what words came to mind when seeing pieces of wood, the same answers always came out: hammers and saws, sandpaper and drills. When I asked five, six, and seven year olds if they wanted to learn to use these tools and others, most of them answered loud yeses with excitement.  Sure, some students looked at the teeth of our saws with trepidation and others were reluctant to help me hold the handle of our power drill, but after a few weeks our students left afterschool classes feeling more confident of their own fledgling woodworking skills. Tools cause trepidation for a reason: saws can bite and drills have a loud snarl when digging into wood; accidents can happen, and that means that there is the potential for injuries, large and small. Regardless, woodworking skills can be an important component to a maker’s abilities–for this reason, we’ve decided to get students learning how to work with wood early on, starting the very first year they join our community here at Lighthouse. That’s why the Creativity Lab closed off the year with a quarter-long focus on woodworking skills: kindergartners made wooden houses, 1st graders created their very own wooden boats, and 2nd graders put together and decorated wooden cars, thanks to support from Nova.
Three broad woodworking categories we delineated for young makers are Shaping, Cutting, and Connecting. Safety is itself important enough to warrant its own category, but it’s also a component that runs throughout any other area and so it functions as the common denominator for everything children are doing when they are first learning proper usage for tools. Things like safety glasses and work gloves are essential to keeping kids safe from splinters and irritated eyes. Modeling proper usage of all tools is a necessity, and setting up norms that guarantee that children continue using tools properly is also a must. In my classroom, the first time a student misused a tool, they were unable to use that tool for ten minutes. The second time they misused it, they lost the right to use that tool for the day, followed by an end of class conversation on safety. Anything beyond that, and a student would lose the right to use a tool indefinitely, until they could adequately demonstrate that their attitude towards safety had changed.
 We found Shaping to be the easiest and safest place to begin. Children were given an end goal, either a house or a boat or a car to work towards, and after putting on safety equipment and seeing proper usage for sandpaper and hand files, they were asked to bevel the edges of 2x4s, to shape the curve of their boat’s hull or the curvature of their car’s hood. Using crayons to mark progress worked really well: students or teachers could mark corners and planes to sand away in red or blue, and students knew that they were properly sanding away and shaping those areas when the colors started to rub away from the wood. Shaping is a long, at times tedious, process that asks younger students to learn persistence. Sanding takes effort and little hands get tired. Letting students take short breaks here and there was a necessity. But also, shaping as a process extended throughout all the many weeks our young makers spent learning how to work with wood. When I was introducing a new skill to a few students others could continue shaping their wood. When students had finished another task earlier than others, they could continue shaping their project.
 This year we introduced Cutting in kindergarten during the school day, and in afterschool we had 1st graders using clamps, a miter box, and this saw to cut the bow of their boats from 10” length of 2×4. In class, I modeled usage of the saw for the class, and then had students try to use it one by one before setting up a sawing area with five miter boxes. Sawing through a 2×4 is no easy task when you’re six years old and it took all of my students two to three weeks (and in some cases four!) to cut their way through the wood. When they were tired of sawing, they continued shaping the hulls of their ship. When they were tired of sanding, they came back to sawing, and finally when that piece of wood fell away, there were cheers around the room, kids congratulating themselves and others when the task was finally done. After cutting hulls, they also cut through smaller pieces of wood, donated decorative trim kids were marking and cutting to use as gunwales for the sides of their boats.
 Connecting was the one area in which we reverted to one of making’s most versatile tools: the hot glue gun. The plan was to have students using doweling as a simple introduction to joinery methods, but time ran thin, and students were able to learn and practice safe usage of hot glue guns in order to adhere larger pieces of wood together. Doweling methods were used, though briefly, to fashion chimneys for kindergartners’ houses and to create the masts for the 1st graders’ boats. With assistance, students practiced using the power drill, holding the tool outwards and pressing the trigger switch to see what it felt like when powered on. Then they drilled into an old log we have in the classroom, practicing how to press the trigger switch while pushing on the drill, then changing the drill’s direction to be able to get the drill bit out of the wood. Once they had practiced, they learned how to use clamps to clamp their wood down onto makeshift workbenches, and with assistance, they were able to drill the boreholes they needed for their dowel chimneys and masts.
After four weeks, there were no major accidents, nothing more than a scrape here or there. What we did have after all that time you can see here in our students’ final projects. More importantly, though, we had young makers who had been introduced to and were incredibly excited to continue work developing their woodworking skills. Though I won’t be here at Lighthouse this upcoming year, I’m certain this young makers will keep up the good work, will keep bringing energy and excitement to the Creativity Lab and to everything they choose to do with the skills they’ve been learning.
![]()
This work is licensed under a Creative Commons Attribution-NonCommercial-ShareAlike 3.0 Unported License.
Summer of Make!
This summer the Creativity Lab will be offering 5 weeks of creative making. Each week there will be a different theme including Fiber Arts, Animation, Toys and Games, Wood and Metal, and Creative Installations.
Artist-Makers, Aaron Strauss and Becca Rose will be based at the Creativity Lab from June, working on the summer of making. This is part of a national program called Maker Corps. Before summer at the Creativity Lab, Maker Corps members take part in a nationwide development program, where they train together to learn an array making, teaching, and communicating skills. They thought they’d take a moment or two to introduce themselves:
 “Hi, I’m Aaron and I’ll be working with the high school students at Lighthouse this summer. I’m excited to learn new ways of working at Lighthouse, and seeing what everyone wants to do. I make my own clothes, my own tools, and teach myself as I go. I make my own shoes to stop myself from buying shoes. I’m always thinking about material properties, construction techniques, design principles, old ways to do new things. I’m looking forward to interesting problems”
See some of Aaron’s work here: http://aaronstrauss.diyartportfolios.com/
 “Hello! My name is Becca Rose, and I shall be making with middle school students this summer. I am very excited about making at the Creativity Lab -especially about electronic textiles, toy-hacking, and the animation! I like to make puppets, illustrations, fiber arts, animation, books and more! And I also love storytelling, and love things that tell stories, or are interactive in some way. Currently, I am learning to code and electronics, and looking forward to making interactive projects at Lighthouse. I can’t wait to see what everyone makes and the stories we tell this summer!”
See some of Becca’s work here: http://www.beccarose.co.uk
Meet the Makers
Lighthouse high school students met up at the Lawrence Hall of Science this morning to show off their projects to the public in preparation for the Maker Faire next weekend. Just like most other makers, our students are currently scrambling to put the finishing touches on their projects.
The event gave them a chance to get some much needed work done.
Explain their work to others – in preparation for the masses of people at the Maker Faire.
And spend some quality time outdoors.
Adaptable Habitats: Integrating Curriculum into 2nd Grade Making
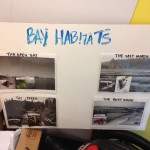
The 2nd graders at Lighthouse are spending the next few weeks learning about habitats of the Bay area and how animals adapt to live in them. Since we have a weekly making time, we decided to do an integrated curriculum making project. The kids (in groups of two) will build one of the four habitats they are studying, including the plants and animals found in those habitats- paying special attention to the adaptations they have that allow them to there.
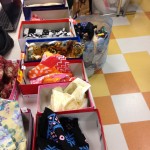
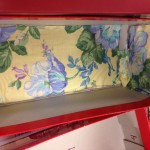
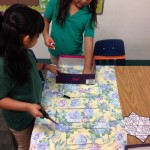
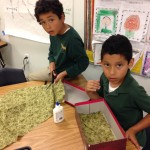
We started the project with shoe boxes (generously donated by Payless) and fabric (also donated), combining the materials to create the backdrop for our habitats.
Prep Tips
- Place the fabric into the shoe boxes before the kids see them and pair up the kids, allow each group to choose from 2 boxes (open the lids so they can see the fabric)- this way they get a choice of fabric, have to make a team decision, and the process moves smoothly.
- Small baskets work great for organizing supplies for each table. For day one of habitats I gave the kids white glue, glue sticks, scissors, black markers (and pastels for the darker fabrics since black wont show up).
- Create a finished example (demo) for the kids, use an extra shoe box to demonstrate how to cover two sides of the box.
- Break the process into 3 steps: TRACE (showing how to use the corners of the fabric so you only have to cut 2 sides, CUT (allowing them to choose from big or little scissors and how to troubleshoot when the fabric is hard to cut by having your partner hold/pull the fabric tight), and GLUE (letting them choose their type of glue, demonstrating how much glue stick or white glue to apply, emphasizing the importance of gluing the edges down).
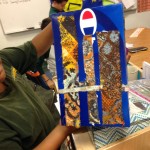
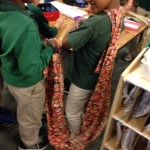
 You can see from the pictures below that some kids finished early and I encouraged them to think about how they could use their extra fabric, and to discuss with their partner what they wanted to include in their habitat. Some groups got very specific, hence the request list the kids drew up for me — which I love because it shows me they are engaged and thinking about making!
The gallery below provides a pseudo outline of our habitat kick-off.
- Demo / Example for 2nd Grade Habitat & Adaptation MakingProject
- Shoe boxes donated from payless and an array of fabrics to be the backdrop of our habitats!
- Materials for habitat background
- Closing circle discussion board – adding a new animal or plant to our habitats each week
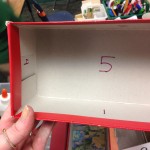
- Numbering the sides of the box to help explain the task at hand
- Starting the lesson by demonstrating how to trace, cut, and glue the first 2 sides of the habitat box
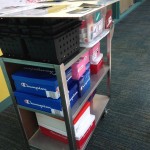
- Making cart on the go!
- Using the corners to make cutting easier (only need to cut 2 sides this way!)..
- Tracing as a team
- Some traced all the sides before cutting
- Caught making…
- What they did with their extra fabric when they finished the insides of their habitat
- What they did with their extra fabric when they finished the insides of their habitat
- What they did with their extra fabric when they finished the insides of their habitat
Answering the Call for Makers: Applying to Maker Faire
This past week, students in the high school ‘making’ elective took time away from their projects to focus on another important task: submitting an application to Bay Area Maker Faire. At Lighthouse, the adults coordinating the school’s Maker Faire entry believe that going through the application process will help students to see themselves as makers.
Working on laptops, each project group appointed one person to register their email address with makerfaire.com. This person will be responsible for checking and following up on email related to the Maker Faire application. Once registered, groups began to access and start filling out the four page application, which asks questions ranging from project name to exhibit lighting preferences to whether groups will be soliciting crowdfunding. Five adults were on hand to assist the groups in answering these questions and help them submit their application before the February 23rd deadline.
Color-Coded Clean Up: Organizing Your Makerspace
During the holiday break the Creativity Lab decided to take advantage of the student-free time by transforming the already awesome makerspace we’ve built, to an even more student-friendly place. The golden rule in organization is this: in the end everything has a place, within the place it functions.
To break this down a little, here are a few things to ponder when organizing your space:
(1) Everything should have a place.
What do we have? How much of it is there? How much space will that need? What else does it need to go with?
(2) Try to arrange things by process or within in a place where it functions.
Are stations necessary? Do you have enough space to pull it off? Can the Kindergartners reach their scissors if we have them on the second shelf?
(3) Adjust as you go.
Are things working? Are the soldering machines too far from the outlets?
Draft a little plan, do a sketch, talk to other teachers that use the space and go for it. Pull everything, and I do mean everything out, section by section and begin to break things down by category.
Excellent things to have on hand during the process:
- Plastic Storage Bins – Large and Small
- Labels (I love and swear by Post-it Label Rolls, 1” wide) OR Tape and Index Cards, anything to help you sort
- Multicolored Duct Tape (see our pictures, I found Duck Brand to be the brand with the most variety)
- Measuring Tape
Other great options, but not required:
- Magnetic Siding
- Magnetic Spice Holders for smaller materials
- Movable Carts
- Peg-hole Board
 At Lighthouse we decided to color code our materials in small (shoe-box sized) plastic bins. Placed on metal, adjustable shelving, they are easy to access and organized thinking of not only how the materials are used, but also by whom. Some of the top shelf items included electronics, glitter, and sewing equipment, while building materials line the bottom shelves, making them accessible to any age. The middle of the shelves hold attaching materials (glue, clips, rubber bands, etc.), tools (rulers, pencils, scissors, etc.), and decorative items (feathers, felt, etc.). The middle shelves are staggered in height by who needs to access them, K-5 is low and 6-12 is higher.
Note: be thoughtful about the heaviness of your boxes the further up they are placed.
Mr. Howard, the After-school Making Instructor started a trend of using index cards to label the materials, illustrating the material and writing it out, adhering one to either side of the box so it can always be seen.
In its entirety the re-organization took about a week to complete and it’s been well worth it. That is not to say glitches have not arisen. Tweaks will always be an ongoing part of organization. Finding out what works best for your space is important and should be reflected upon from time to time.
The best way to test your new organization is by releasing it to the kids (or whomever the user of the space is). We briefly introduced the kids to the new space and then let them explore. At the end of that first class, and then the second and third, it became quite clear that teal and baby-blue look too much alike when kids are rushing to clean up.
Problem Solving an Organizational Crisis: What to do when the system fails
Crisis: Are thekids confusing the colored labels because they are too similar?
Problem: We don’t have any other colors of duct tape!
Solution: Just add white stripes to the teal ones.
Test: Success! Plus we found out that other colors of duct tape were available on amazon – phew!
No, that is not groundbreaking, or particularly helpful. However, it illustrates my philosophy on organizing artist spaces and makerspaces alike. Know who is using the space and how they are using it.
Get creative, make you space inviting and inspiring. Make the right materials accessible to the right kids. Put your glitter up high and lock up the cutting tools.
One last thing, please feel free to share your wisdom, tips, or tricks by commenting below.
Preparing for Maker Faire
As I walk into Ed Crandall’s classroom on a Tuesday afternoon, it’s hard to find a clear focal point, a single place to direct my attention. Students are stationed around tables throughout the room, most in small groups, working to build physical objects of their own design.
Ed is the instructor for the ‘making’ course, an elective available to high school students at Lighthouse. Observing his class for the first time, I am not sure what to expect. Shortly after I enter the room, Ed gives me a quick rundown of his students’ projects, ushering me to each group’s work area as he talks. One group is working on a mind-controlled robot, another is creating a cardboard prototype of a miniature city, and yet another is building a prototype of a tricycle out of PVC pipe. All groups are working on a project that they hope to exhibit at this year’s Bay Area Maker Faire, to be held in San Mateo on May 17 & 18. After chatting for a few minutes with Steve, a retired computer programmer and classroom volunteer, I begin making my way around the room to talk with each group individually.
I ask a few groups about how they came up with the idea for their project. One student, part of a team of two working on a foam model of an aircraft, tells me that he likes airplanes and wanted to make something that would fly. Another student, who had just finished 3D-printing propeller guards for a quadcopter, tells me that he wanted to make something remote-controlled. One student making a prototype of an LED-embellished scarf with a partner chose her project because she liked to wear scarves.
That one class could accommodate such a wide variety of student interests was impressive to say the least. The ‘making’ elective seems to provide students with a personalized learning experience that goes beyond instruction at an individualized pace. Students are given the opportunity to develop skills in areas of interest to them, through projects of their own choosing, and as an observer, I saw many students who seemed engaged in the process of bringing their ideas to life. One student working on the mind-controlled robot project is building on her prior programming experience, while another who learned to knit a scarf from her project partner is developing a new skill. While both students are learning skills in different subject areas, both are engaged in experiences that hold educational value for them.
And while students in the ‘making’ elective hope to get a chance to exhibit their work at Maker Faire in May, they are already using the internet to share projects ideas. Using a tumblr account set up for the class, students have begun to post personal bios, photos, and project descriptions. The tumblr gives students a space to document their work while also providing an opportunity to practice communicating their ideas to a wider audience. Learn more about what these students are working on at the ‘making’ elective blog.
This work is licensed under a Creative Commons Attribution-NonCommercial-ShareAlike 3.0 Unported License.
ING Unsung Heroes – Supporting Creativity
Over the past two days, I had the pleasure of meeting an inspiring group of educators and financial service providers. Yep – you read right, financial service providers; I was attending the ING Advisor Insight meeting in Las Vegas. The educators in the group were fellow award winners and members of ING’s Educator Advisory Board , the group that selects the winners for the ING Unsung Heroes award program.
You may still be wondering why I was there. This fall I was amazed to learn that the Lighthouse Creativity Lab, our making program, won 3rd place in the Unsung Heroes program. Around Thanksgiving I received a call from Randy James, the Chairman of the Unsung Heroes Award Program asking me to attend this conference so that I could talk with their staff about our design and making program. One thing I found interesting is that all three of our projects involved significant making.
The first place winner, Allison Butler, integrated her art curriculum with Physics. The interesting thing is, since her students are attending a bio-medical magnet program, they weren’t expecting to take an art class. She is using the concept of hard-fun to help her students see themselves not only as scientists, but as extremely capable artists. She has students using mannequins and combining artistic media to study motion and using recycled books to create self-portraits and poetry. With her award, she is planning to integrate photography and technology into the curriculum all with a focus on deepening her students’ understanding of art and physics.
Eric Songer, who won second place has been bringing the School of Rock mentality to his music classroom. He asked himself how he could involve more students in music education and realized that giving students a choice of the genre of music would get more students interested in studying music. His students are now performing in many student bands (garage band, mariachi, hip-hop to name a few) and producing the shows as well! With his award, Eric has purchased musical equipment to create a more professional musical environment for his students to learn in.
With our funding, the Creativity Lab, is helping our elementary students learn to program. We purchased Lego WeDo kits earlier this year and have started to use them in our 2nd grade class. In fact, the same day I was giving a talk in Vegas, our 2nd graders were programming their Lego lions for the first time.
Finally, it was a pleasure to meet the people behind the Unsung Heroes award. Education Advisory Board members are teachers or administrators who are extremely knowledgeable about education as they have spent their entire careers working to improve it. It was also great to find that the group is really a family and it was extremely comfortable for us to join them over the two days and have discussions about education and about our lives outside of school. Finally, it was also nice to hear from some of the ING folks. With all the bad press the financial services sector has been receiving recently, it was refreshing to talk to people who clearly care about helping their customers plan for a comfortable retirement and who see the work teachers do as vital to our futures. If you are interested in applying visit the ING Unsung Heroes information page!
Life Academy Makes
Life Academy recently finished their first round of making projects as part of our collaboration.
This project gives students the opportunity to express themselves and create
And now, onto soldering
