(written by Ed for Designing Purposeful Making Experiences, Jun 2017)
Statement – What is purposeful or meaningful making? Start with a statement.
Purposeful Making leads students to understanding the design process. They learn to take an idea or problem, find a workable solution and make it real through prototyping, testing, giving and receiving critique from their peers, and improving through several iterations to arrive at a useful item that exists in the real world. They also learn many skills along the way, work with their hands, direct their own learning to a large degree, persist through difficulties and build a community in their class that they trust and help. In many ways this parallels the skills the students will need to be successful when they leave school and enter the workforce in any job requiring collaboration (pretty much anything these days).
Journey – How did you arrive at this statement/understanding? What experiences have you had that supported you to get there (at school, in life, etc.)?
The project I worked on is a synthesis of my thinking over the last several years of what makes the making class a useful class for students, and why they should take it, and why they should care how their projects are used when they are complete.
Examples – Provide an example of a project that is purposeful and/or meaningful and describe why it is. You can also provide a counterexample.
The schools “hang out” bench created by 3 boys a couple years ago in the making class. This project was designed for students to have a place to chill and possibly nap during their breaks. It is the most visited place on the playground. The students took tremendous pride in building it, went through at least three iterations of plans, improving each time and creating multiple prototypes, until they arrived at the final design they constructed.
Project – Explain the project you worked on at Designing Purposeful Making Experiences & how you shifted it to be more purposeful and/or meaningful.
This is a replacement skill builder for the “pillow” and “arduino programming,” combining both into something the students can be more creative with. (Editor’s Note: See more details below.)
Reflection – Provide any reflections you have about the experience you had at Designing Purposeful Making Experiences. Has your concept of purposeful/meaningful making changed during our time together?
I was frustrated because of the many school responsibilities that kept cropping up and taking my attention.
Project: The Electric Monster and Making Making Meaningful (mmm)
After discussing with Aaron, I am looking at making each week of the class (both making and robotics) follow a certain pattern for the first month of school:
- Do (a goal for the week)
- Gather Documentation (each day, in for form of photos, video, text, audio, etc., like I am doing now)
- Reflect (things I did well, things I can improve on)
- Critique (presentations, pair-shares reviewing each other’s work and giving feedback)
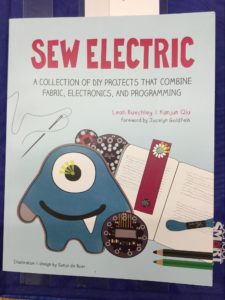
I will also be working on a simple-ish project today (sewn monster with arduino and LED from a book). This monster, together with this post, can act as an example for the students on how to do their first week of class.
Eventually, over this summer, I need to pull together a bunch of resources for student projects to work on over the first 4 weeks in the areas of:
- Woodworking (chairs, one week)
- Arduino / soldering (monsters, fidget spinners, )
- Laser cutter / 3d printer / software to use these ()
- Welding
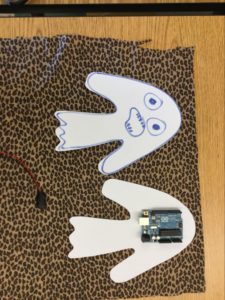
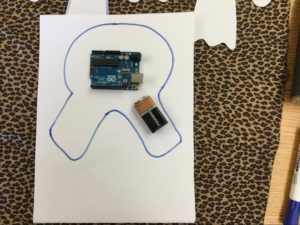
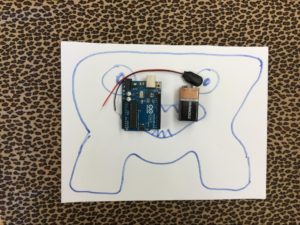
Hour 1 -Drawing my monster template.
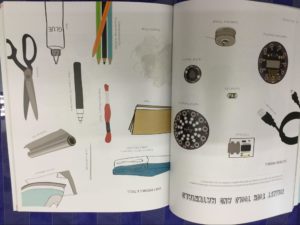
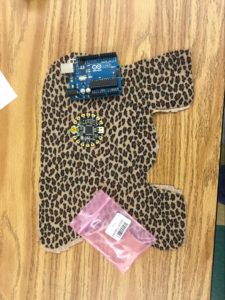
Finding parts (need switches that can be sewn onto cloth if I do this with the class, I am substituting with two alligator clips and the idea that this will be a conductive material testing monster – they will be my switch). Another take away: to do this with an arduino board (I don’t currently have any lilypads) I need a bigger monster (it has to fit bigger stuff inside). Below are the instructions for the project, along with my monster concepts and growing size, and also the parts I intend to use to build my monster.
Hour 2 – Drawing the circuit diagram on the monster.
I realize that using conductive thread has a drawback: it is visible as it is sewn through the monster. This means I don’t route it the way I would wire – it is going to be part of the visual experience of the monster. I need the circuit to make sense in some way, and be careful the bits of positive thread do not touch the bits of negative thread (which would cause a short). I am thinking about having the negative thread sew the monster together (be the seam) and connect to the arduino via a wire with a loop in it. I will have the positive wire from the arduino be the sewing around the eyes, and it will also connect to the arduino via a looped wire. The wire bits will be insulated, and some soldering will be done on these to split for the two eyes. I am also realizing it might well take more time than I have to finish this project (by the end of summer no problem, in the next few hours, not likely). I spoke with Aaron again – I was thinking of how one of the artists I have met manages to include the thread / tape conductors as a primary visual element in her art and now trying to do this is driving me crazy. Aaron said: don’t do it. If it is driving you crazy, it will do the same to your students. This is a prototype, just sew the threads on and be done with it. Aaron also had smaller arduino controllers for sewing contacts too, as well as an ugly switch for power, so I will use these components and simply sew on the circuit (keeping positive and negative clearly separate).
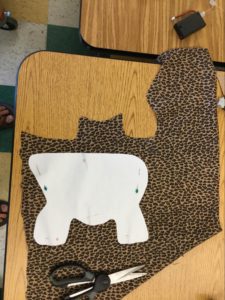
Cutting out the monster:
Hour 3 – sewing
Monster goes together bit by bit, then sew on circuit with two sides attached so it can move from front to back of monster across the attached part.
Sewing the two sides together:
The arduino was attached using non-conductive thread sewn through a couple of the contact points (ones I do not intend to use, but I could probably use any as there is still plenty of exposed conductor in these holes to attach conductive thread also).
The battery pack was attached using hot glue. There was no clear way to sew it on, so I used the fastest solution I could think of. The battery pack has a switch on it, which was positioned to protrude through a small hole in the back of the monster.
I then sewed the ground wire from the back of the monster to the front (where it will attach to the the neg lead of the two eyes / LEDs) across the sewn line connecting the back to the front of the monster.
Ed Crandall has been teaching 7 years at Lighthouse Community Charter School, but came into teaching late in life after many other careers in engineering.
