In a perfect world I’d sit them all in two long rows, facing each other, scissors in hand, able to look up, across, or over for help and we would walk through cutting tightly curved lines. But what world is perfect anyway? Welcome to making with first graders.
As a fun introduction for making Making Journals I decided to try out stamp making. I wanted to have the kids make a stamp with their initials that they could use throughout making and in their making journals. The stamps took only two days to make (one hour per day) and regardless of the challenges, ended up being pretty awesome.
Day One: Making Our Stamps
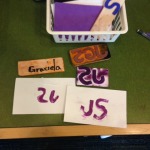
- My sample / demo stamp… without which I would never have known how important mirroring the initials would be…
- Demonstration samples, showing why mirror imaging matters with letter…
- Basic stamp making supplies…
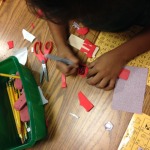
- Writing on initials and forming our stamps…
- Helping our friends when we have finished!
Materials Day 1
- Scrap Wood, we used shims (one per student)
- Adhesive-backed Foam (one 3×4″ piece per student)
- Sharpies, which did NOT work as imagined, they bled (one per student)
- Sandpaper (one 2×3″ piece per student)
- Scissors (one per student)
The Gist of It
Write initials on the WHITE side of the foam, thicken them, cut them out, peel off the white part, stick on to wood in reverse order (mirror imaged), sand wood down using fingers to check progress.
Tips & Tricks
The sandpaper is a great tool for distraction while you (as making instructor) try to balance helping all 24 or so kids get to the same goal. When they say they are done I ask them to rub their fingers along the wood, saying, “is it bumpy or does it feel smooth?” That seemed to motivate them into becoming fine artisanal bevelers, in addition to the stamp makers they’d already become.
As luck would have it, 11 minutes before making was supposed to start I realized one small stamp pad per table just wouldn’t be enough to keep these eager makers engaged. I managed to invent a new DIY stamp pad using wet sponges, an old deli container, and watered-down tempera paint. They worked like a charm and the kids used them side by side with the six ink pads I did have – some of which were dried up, luckily a little water brings them right back to life.
Day Two: Stamp Testing and Redesigning
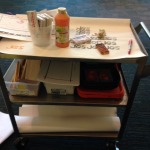
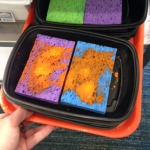
- Making cart ready for day 2…
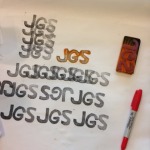
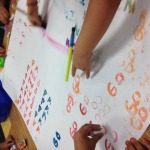
- Stamping samples to spark ideas…
- DIY Ink Stamp Pads!
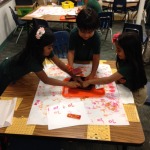
- 1st Grade Stampers…
- Someone found a glue stick cap and tried it out, she saw me see her doing this and looked to be expecting me to say that was wrong, I just smiled at her and said, “I like it. Just make sure to wipe it down when you are done.”
- Stamping in action…
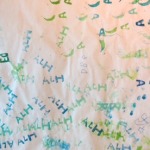
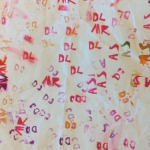
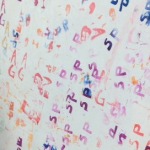
- Stamps by 1st graders!
- Paint striping under the stamps, loved this…
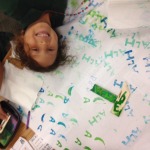
- Very happy stamper…
Materials Day 2
- Homemade Stamps (one per student)
- DIY Ink Pads: container, two wet sponges, watered down tempera paint (one per table)
- Ink Pads (washable, one per table)
- Poster paper (one per table)
- Foam & Paint Brushes (for over-sized stamps and testing new methods or patterns)
- Paper Towels for blotting
- Water and a spare sponge or paper towel to refresh dried up ink pads
- Cleaning wipes
- Spare Foam, Wood, Glue, Sharpies, Scissors for Re-designing needs
The Gist of It
Test stamps (try creating patterns, flipping stamp, using a brush to apply paint if needed), fix stamp if initials don’t print in the right order or facing the right direction, 15-20 minute cleanup time, circle up to discuss challenges and discoveries.
Tips & Tricks
Rotate colors every so often between tables (my DIY stamp pads were the same at each table, but I swapped out the small ones a couple times during the hour and it THRILLED them.
Some students ended up with over sized stamps from day one, when I saw them struggling I gave them a paintbrush without explaining how to use it. Then after the first 15 minutes I gave each table one foam brush and one paintbrush- not enough for each student, encouraging sharing. I told them to experiment, rather than paint. When I caught a few trying to paint we talked about how the paper was too thin for water, comparing the stamped sections to the painted, and suggested they try other ways to use them.
So Many Lessons Learned
- Cutting around curves of letters is hard! 1st graders WILL need help with this.
- Feeling what we are sanding is how to check our progress.
- ‘Thickening’ is not a word 1st grade understands. I might try stencils and larger letters / wood next time or simply spend more time talking about how to thicken our letters for cutting.
- Mirror imaging is tricky for everyone, using the white side of the foam allows for less confusion. Next time I would bring in mirrors on day one so the students could use them to check their stamps.
- Initials is a word we don’t understand yet! And it is a concept we don’t yet grasp. Plus sometimes names change and that is confusing. Having a list of student names will help if you aren’t familiar with the kids.
- Hard is okay as long as we can eventually succeed. One of the first grade teachers (new to making) instinctually began cutting out her students letters for them. She was worried that it was just too hard for them. After day two we talked about the ideas of failure and how perseverance through struggle is at the root of making, so long as they can actually accomplish the goal in the end, the struggle is where they learn the most. In this case, the letters may have in fact been a little too hard, or perhaps we should have just used one. I will say many of the kids ended up just taking little pieces and sticking them together to make up their letters, which where butchered in the process, and they turned out great. They had success and I watched them learn to adapt a process to fit their abilities. As long as they CAN reach the goal, hard is good for them.
- It always takes longer than you think it will and different groups move at different paces.
I know a lot of people fear the messy, especially in a classroom full of kids. It is work, but I am pleased to tell you this messy looking making was pretty easy to clean up. Especially when you enlist mini-cleaners to help!
Hand-stamped Gift Wrap! It wasn’t until they finished these and I saw them in a pile to toss that I realized they’d be amazing custom gift wrap once dry. Amazing fundraising opportunity. Place your custom order now!
Next week the first graders are going to see their printmaking skills turned gift wrap. I’m thinking it just might boggle and expand their creative little minds!

Scribble Wrap! Back in the creativity lab scribblers were being used and I’m thinking these have wrapping potential too!

